Why are kids so sticky?
I’ve been a proud parent for about 3 years now, so I thought I’d answer some basic questions about children for those of you who don’t have any to study.
- Why are kids so sticky?
Children are in the pupal stage of human development. They constantly excrete sticky and viscous coatings as a defense against predators. - Why are kids so loud?
This is the natural response to hearing too many dad jokes; they are simply trying to drown out the terrible puns and word-play. Good luck to you, children. Maybe you can save us all. - Why do kids throw temper tantrums at the store?
They are too small and inexperienced to successfully shoplift the items they want. You try packing a Dora the Explorer tea set into a size 4 diaper! - What happens at the hospital when the baby is born?
a) Women – You are welcomed into the secret enclave where you are given all the knowledge of the cosmos; in effect, you now “know everything”. Eyes are installed in the back of your head, and your hearing is upgraded to include the “dangerous silence” app. You also get cut or torn open to remove your new human.
b) Men – You are dressed in scrubs and taken to your secret dad training session. You will learn the basic phrases and terminology needed for your new life: “Put on a sweater”, “Who touched the thermostat?”, “I need to go to the hardware store”, “Hi Hungry, I’m Dad!” Your mustache will spontaneously appear while your hairline recedes. Your brain will get the “Lame Joke” downgrade.
c) Same-gendered couples – You get to choose which of you gets which options with a full-contact Rock-Paper-Scissors match. - Why do children run everywhere?
Their batteries are still new and fresh. They will gradually slow down as they age, as evidenced by 90 year old humans shuffling around the mall. - Why are children always laughing and playing?
They haven’t had the joy sucked out of them by reality and adults yet. Many evil adults, such as Rush Limbaugh and Joan Crawford, are sustained by draining the happiness from small children. If you’ve ever wondered how your horrible Great Aunt Myrna is still alive, check to see if there’s an elementary school near her home. - Why do children always have snotty noses?
Our bodies actually create the same quantity of mucous our whole lives. Children’s sinus cavities are just much smaller than adults’, therefore less of it is contained. - Why do so many children have peanut allergies now?
This is the result of the current “foodie” movement. Babies as a whole have decided that peanuts are passé. And who can blame them. - Why do kids put everything in their mouths?
Much information can be gained from an item by licking or biting it. Babies are very curious, and want to learn all they can about the world. Adults have already assimilated most of the information available from biting things, therefore no longer need to. Imagine biting a book: you already know what it would feel like, right? You’ve bitten everything you need to, but they have lots more biting to do. - Bonus question: Why do parents drink so much wine?
It’s easy to disguise in a coffee mug.I hope that was enlightening for those of you who don’t have kids, or haven’t had kids around in a long time. They’re a lot of fun, and more manageable if you just pretend they’re tiny, drunk adults.
Cornmeal Biscuits

I’m always looking for new, cheap recipes, and I stumbled across this book at my library:
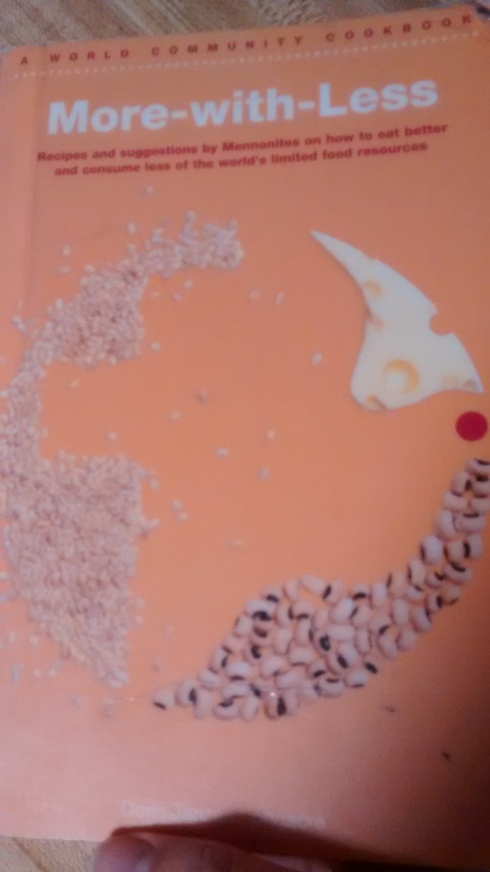
The “More with Less” cookbook was originally written in the 1970’s, and has since been updated. It had lots of useful recipes, and ideas for using up leftovers, which I’m clearly a fan of. I also keep an eye out for allergen-free recipes, since my kiddo is allergic to most things that taste good. This recipe for cornmeal biscuits immediately caught my eye, because I accidentally bought too much cornmeal, and now two giant, hulking sacks are taking over my whole pantry.
Cornmeal Biscuits
Combine in a bowl:
1 cup cornmeal
1/2 tsp salt
1 tsp baking powder
Add:
2 tbsp fat (bacon drippings are good)
1/2 cup milk
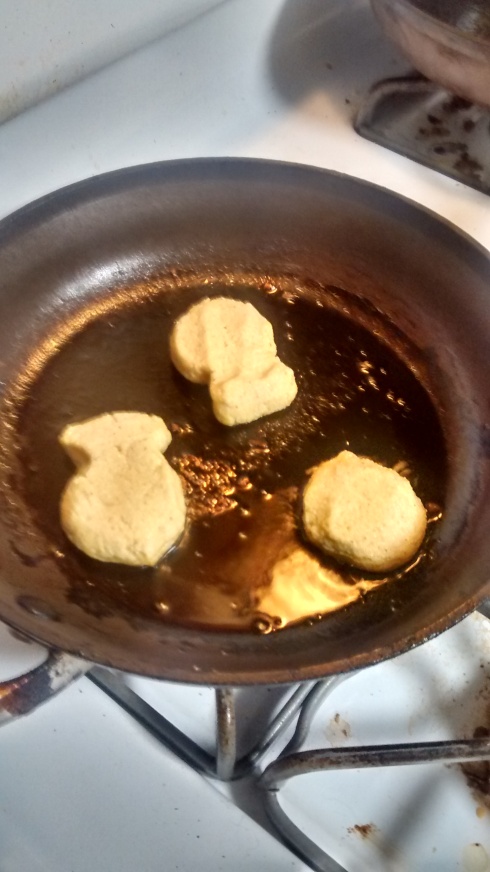
Grease a large, heavy skillet with bacon drippings, Drop batter from a tablespoon, shaping into 4 biscuits, Brown on both sides. Serve hot with butter or margarine.
Some variations: I used olive oil, rather than bacon grease, and you can mix some herbs in for different flavors. I’ve also mixed cheese into them before, and those were pretty tasty. I had an extra bag of fish fry sitting around, so I substituted some of that for half the cornmeal, and they were very flavorful.
I formed some of the biscuits into fish shapes, to copy the fish biscuits from the Octonauts cartoon. My kid absolutely loved them. They are a bit crumbly though. I’m planning to try adding some flax meal as an egg substitute, to see if they hold together better, but feel free to try an egg if you aren’t dealing with that particular allergy.

Overall, they are tasty, and crispy. They go great with butter, and even jam or honey. They are a bit crumbly, but I hope to fix that in future variations. This would also be a good batter to use as a casserole topping for those with food allergies. Or if your kid is obsessed with Octonauts, they were very easy to form into fish shapes. Have fun with it!
DIY Fingerless Gloves
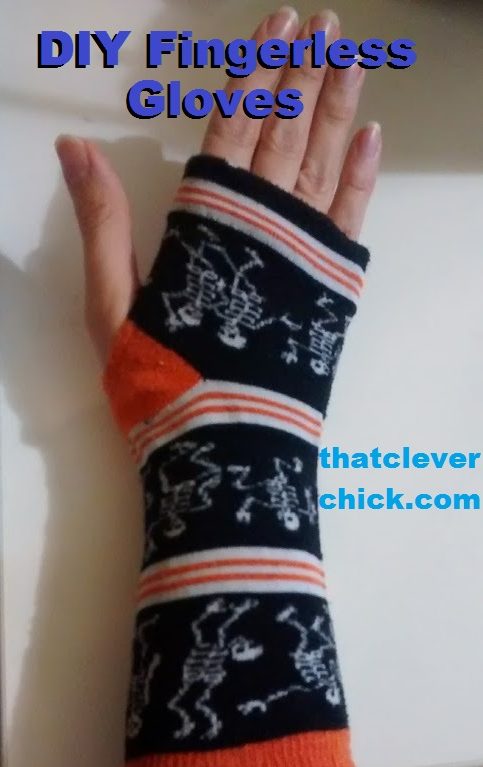
I freaking hate winter. It’s the worst. In summer you can go to the beach, the pool, play in the sprinkler, or just lay around to cool off. There is (thankfully) no snow where I live, so there’s just nothing to do. We’re all just trapped inside, stumbling over each other, fighting over the best blanket in the house. On top of that, one of my FAVORITE pairs of Halloween socks got holes in the heels. If you know one thing about me, it’s probably that I’m a cheapskate. If you know two things, you probably know that I love Halloween more than all the other holidays put together. That’s right, even more than Washington’s birthday! I mean, look at these awesome socks:
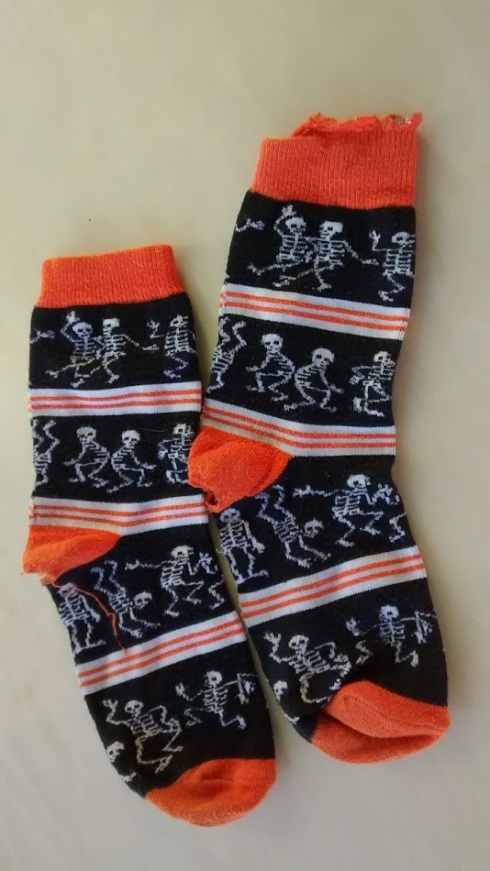
When these socks became unwearable, I stuffed them in my scrap bag, awaiting an epiphany. I couldn’t just throw them away! Well, here we are, epiphany-had!
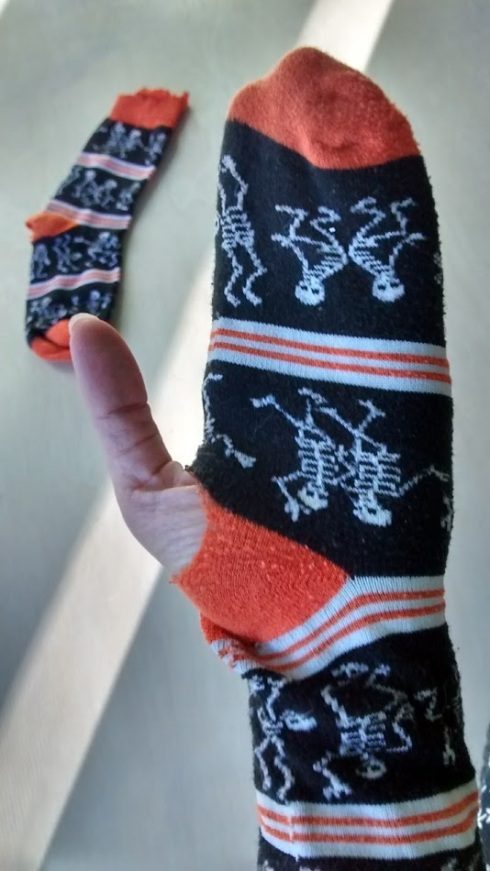
I didn’t even have to cut a thumb hole! I did hem it, however.
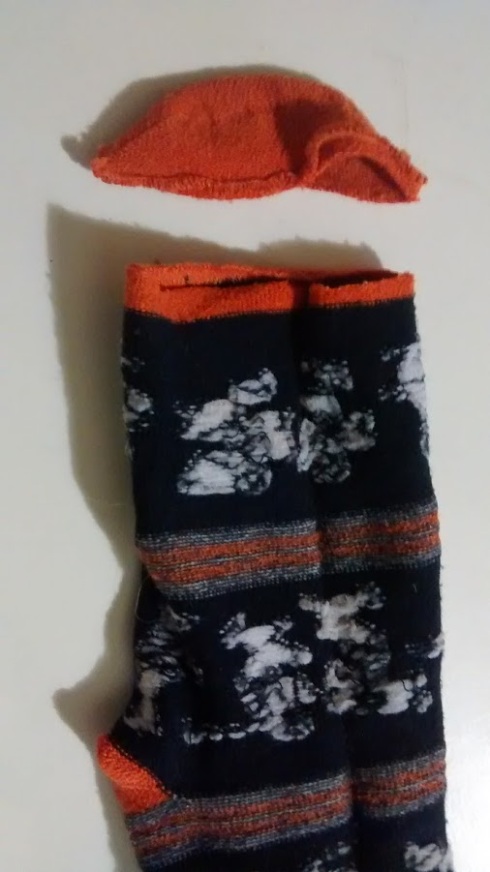
First, I cut off just the tip of the sock, just under that annoying seam that always pokes my pinkie toe no matter how I rearrange it.
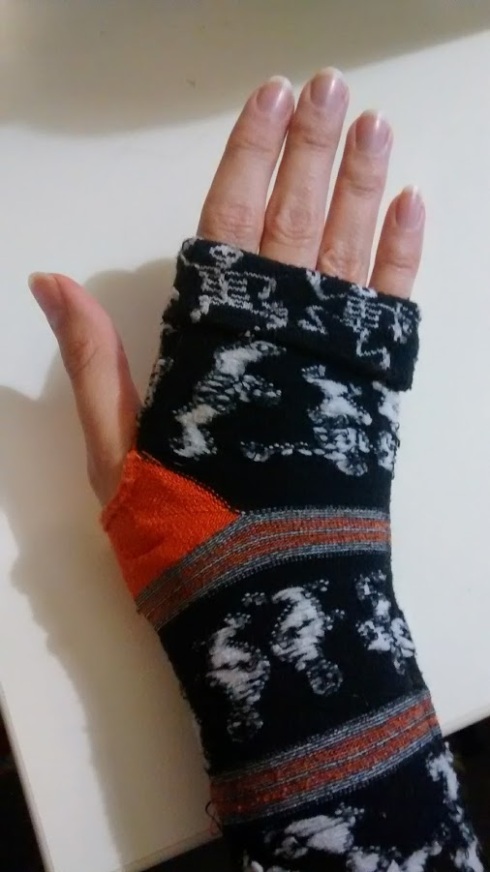
Then, I put it on inside-out, and folded the top down until it was the length I wanted. I then pinned it in place, took the sock off, and hand sewed the seam in place. Because these socks have stripes, it also made it easier to ensure I was folding it straight.
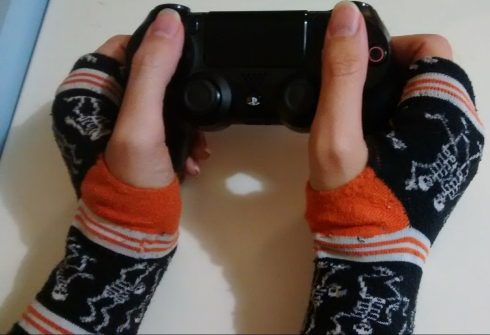
And we’re done! The whole thing probably took an hour or so, but it’s hard to tell because toddlers and dogs kept distracting me. But now I’m ready to kill some zombies in comfort! And I can keep my amazing skeleton socks! Honestly, I’m so happy with these I’m almost jealous of myself for having them.
Silly Faces for Lunch
I think all of us are could benefit from getting more veggies in our diets. Yes, even you, T-Rexes. Lots of people have to find ways to “trick” their kids into eating vegetables, which I’m totally on board with. Trick your kids as long as you can get away with it! Personally, I end up having to trick myself into eating more veggies, not because I don’t like them, but because I just kind of forget there are foods other than coffee and cheese.
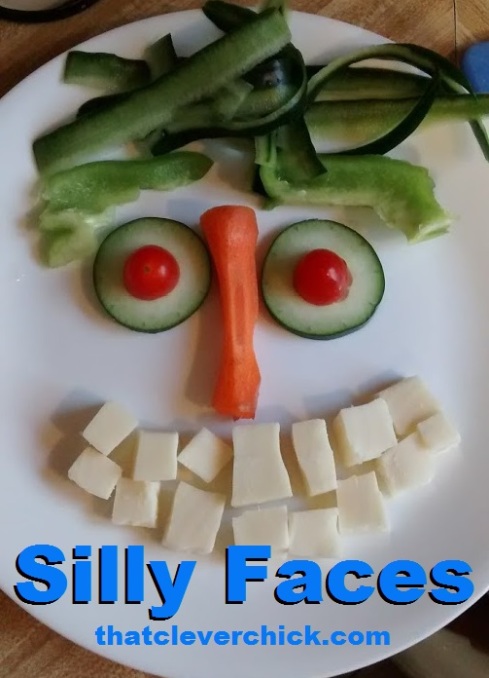
The other day, we were all hungry, I had too much produce in the house, and the 3 year old needed an activity. I stood him on a chair in the kitchen to help me make silly faces for lunch. I saw this in one of his Elmo books, so it’s clearly a good idea.
I cut up cheese for teeth, cucumbers and tomatoes for eyes, and used cucumber and carrot peels for hair. You can use whatever you have in the house. And let the kid be creative! Don’t get hung up on it being a face, necessarily. I’m here to tell you, LOTS of those pictures on pinterest are plain old lies. No, random blogger, I don’t believe your 18 month old perfectly decorated that Christmas tree craft you’re guilting me into doing. So here’s what my 3 year old made:
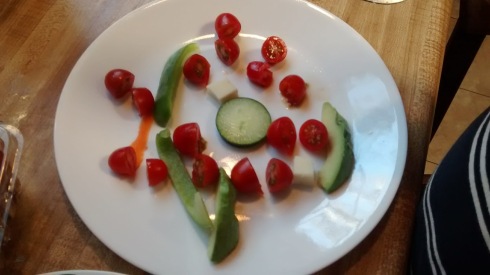
See? Perfect three year old artwork. And he ate ALL OF IT, which was the important part. I made this one for myself, and it’s far more terrifying:
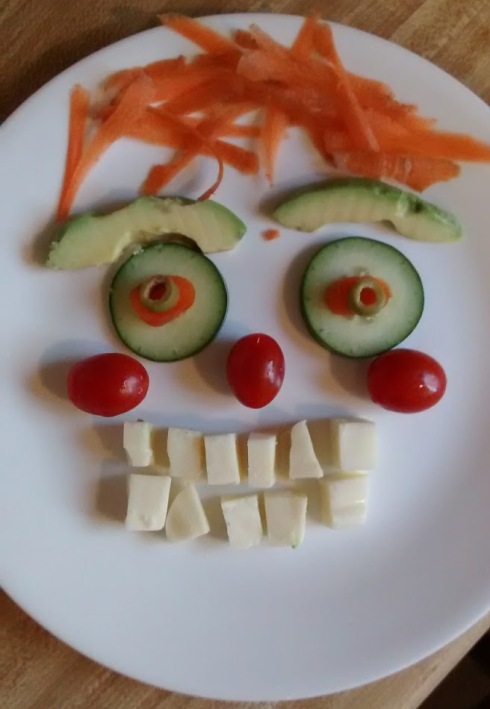
I’m not sure why it came out like a nightmare clown, but whatever, it still tasted good.
Some ingredient ideas:
Broccoli
Cauliflower
Snap peas
Rinsed, canned beans
Carrots
Cherry tomatoes
Cheese cubes
Radishes
Cucumbers
Olives
Hard-boiled eggs
Peas
Avocado
Spinach or salad for hair
Cottage cheese
Whatever needs to get used up in the fridge
This was a fun way to “cook” with my kiddo, let him do something creative, and get all of us fed at the same time. So clean out the produce drawer and have at it!
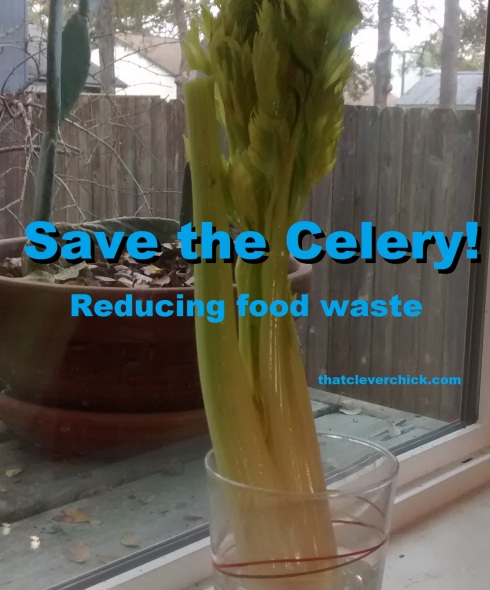
Save the Celery!
We’ve all had that moment were we open the produce drawer only to be confronted by a wilted, accusatory vegetable.
“You wanted me! You drove all the way to the store, wandered the aisles for an hour, and selected me to come home with you. Then you just forgot me?!?!!”
“Look, I’m sorry, Celery. I just got busy-”
“Oh, please. You managed to cook the squash and the broccoli! You cook all the time!”
“I know, you’re right. Look, let me make it up to you.”
“I’m listening….”
“I’ll write a blog post all about how to use up celery in your condition, so that no celery ever gets wasted again.”
“And?”
“….And, I’ll give you a bunch of dialog, so you can yell at me all you want.”
“Deal!”
So here we are. As I said, I bought too much celery, only to find it limp and unappealing. What to do?
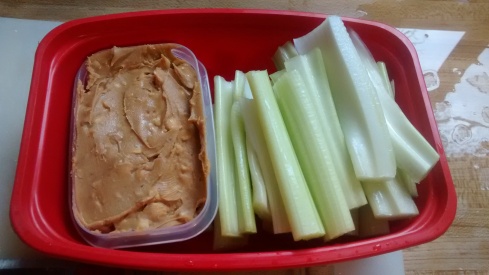
If the celery is not too bad, just on the cusp of “Oh crap, I better use this up right now”, cut it up for snacks! I’m very fortunate in that I can hand almost any food item to Hubby, say “I made you a snack!” and he’ll eat it up. Much like Joey on Friends when their fridge broke. You can always count on me for current pop-culture references!
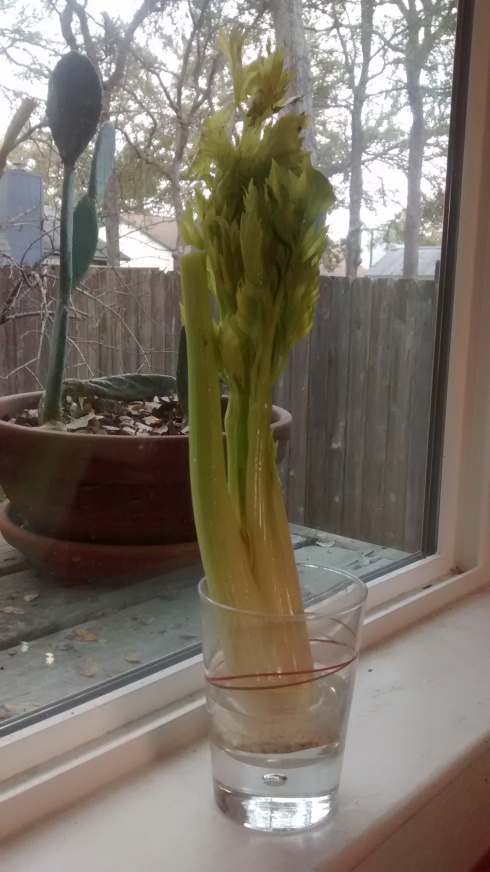
When the celery is just a little wilty, cut some of the bottom off, then place it in a glass of water. It’s still a plant, and it will suck up water like a 3rd grader’s science experiment. If any of the leaves are gross, just throw them away, and clean the celery off. You can use the same trick with green onions.
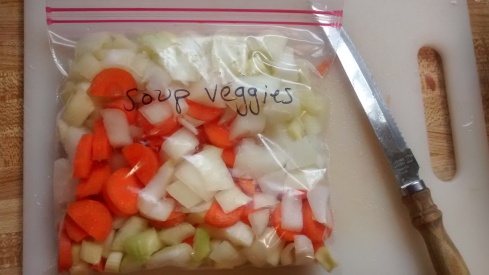
Chop it up and freeze it. You can either cut it up by itself, or with carrots and onions, as I’ve done here. The next time you’re making soup you can just throw your pre-chopped veggies in there, and pat yourself on the back for your frugalness! Go you!
The only way to save money is not to spend it. One way to do that is to eat the food you already have, rather than buying new.
HALLOWEEN COMETH
Halloween is by far my favorite holiday. This year, I’m having to hand-make a Voltron costume for my 3 year old, Nacho, so I’ve been a bit busy. I’m digging around for some last-minute, office appropriate costumes, so I thought I’d share my ideas with you!
Brad or Janet from Rocky Horror Picture Show:

The cast of Breakfast Club:

Characters from Jessica Jones or Luke Cage

And you must love Kimmy Schmidt (unless you’re completely dead inside)

The cast of Shield, like Quake for example (I’m noticing that I’m very biased toward Netflix and Marvel properties…)

Plus, since I love Halloween SO MUCH I WISH WE HAD TWO OF THEM, I have a bunch of old posts with even more ideas for you!!
And finally, this is the plan for my Monday office attire:

Totally office appropriate, and comfortable! I can’t wait!!
DIY Reusable Counter Wipes
I am always looking for ways to cut my spending, make life simpler, and reduce waste. I have often seen and been tempted by those disposable, sanitizing wipe things that come in huge canisters, and I’ve found myself grabbing baby wipes to clean up more things than just my baby. Well, no more! We can make reusable, washable, non-toxic wipes ourselves!!
You will need:
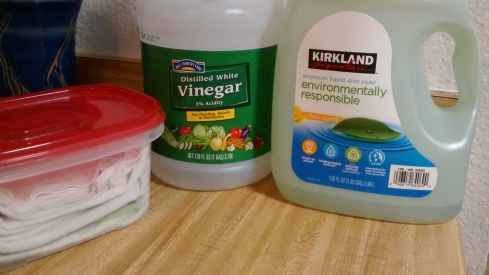
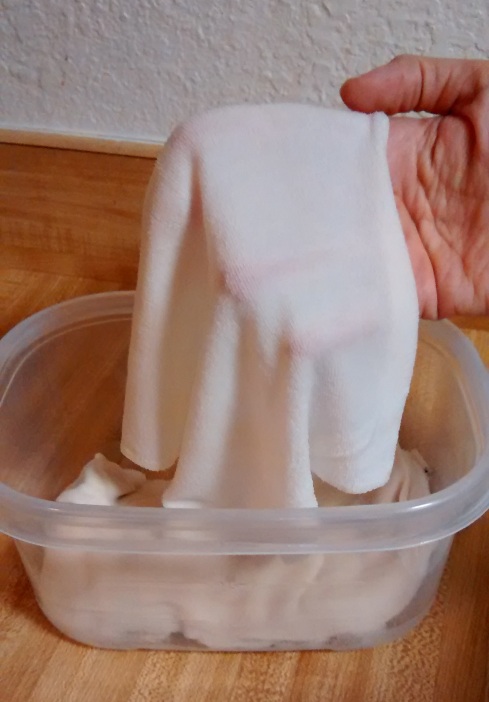
Wipes, (I used baby wash clothes I had laying around, which I’ve found for about $6/12 pack online. You could also repurpose an old towel, sweatshirt, or other absorbent fabric), vinegar, dish soap, water, and a container or two. If you buy new wash clothes, make sure to run them through the wash first. In your container, mix 1/2 cup vinegar, 1/4 cup water, and a couple drops of dish soap. You can add essential oils if you like that kind of thing. I’ve also used less vinegar before, so they don’t smell so strong, and it worked fine. Swish that stuff around, then smush your wash cloths down into the liquid. You want them to ideally be damp, but not drippy.
And now you’re ready! Wipe up any little spills without guilt! For dried on stuff, I spray plain vinegar, let it sit for awhile, then wipe everything down. When I’m done, I just toss the wipes in with our regular laundry. Note: you don’t want to use dryer softener, like Snuggles or Bounce, with these, or any other towels. It coats them with softeners which reduces their absorbency.
I make one batch at a time, and have another container of dry wipes ready to go. Some people use this same recipe with paper towels so they can throw it away when they’re done, and that’s up to you. I use paper towels for exceedingly gross stuff, like anything that comes out of my cats, but kitchen counters aren’t heinously disgusting like those little hell beasts.
Anyway, this recipe is great. My kitchen is already oodles cleaner, and we’re not burning through paper towels at a frightening rate anymore! Now go forth, and save!
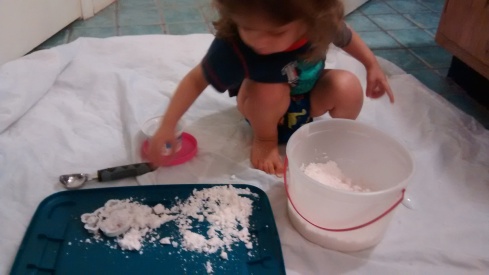
Everything Messy Play
My previous post made me realize just how much I know about messy play for toddlers. It’s really time consuming to stop random people on the street and share my wisdom, only to find out that they don’t even have kids, and I should “Go home and put on pants”. Whatever, I’ll just share my knowledge with you lovely minions who appreciate my pearls of wisdom.
Messy play is one of my favorite things for so many reasons:
- It absorbs my toddler, Nacho, in a way few things can. That sentence makes it sounds like the Blob is ingesting him, but you get what I mean.
- Messy play is even entertaining for young babies. I know when Nacho was small, I was definitely at a loss for things to do with him. You can only coo at a wiggling burrito so much!
- It’s CHEAP. Having a kid is expensive, especially when yours eats like a linebacker after the big championship game (the Wonderbowl? The Supershow? You know, that sports thing that happens too often for some reason). The most basic form of messy play is a mud pit, which is free! The other recipes I use are generally pretty cheap, which is always great.
There are lots of variations of messy play, and honestly, just a quick browse on pinterest will overwhelm you with options. Well, I have sorted through tons of those links, and picked out my favorites. I look for recipes that are cheap, easy to clean up, and allergen free (no wheat for my poor guy). Several of these are also taste safe for younger ones.
- Slime – You will need a fiber supplement with Psyllium as the active ingredient, food coloring, water, and a microwave safe bowl. I love this recipe because you only use 1 tablespoon of the fiber stuff and 1 cup of water. Whisk this together with a little food coloring, then microwave for 5 minutes. Here is the link to the original post I used that has lots of Q&A if you need more details.
- Oobleck – Mix 1 cup water, 2 cups cornstarch, and some food coloring. I like to make one big white batch, then separate it into small containers to add color. I usually don’t measure anything, and just kind of mix it around until I get a good consistency. Oobleck can be reused if you spread it thin, and let it dry thoroughly. Just add water again and remix it. I usually reuse it within a couple days, and just once. There are tons of variations on this basic recipe all over the magical internets, but I stick to the basic one.
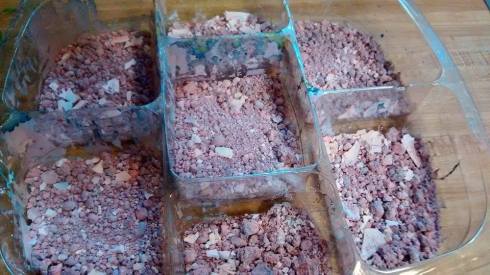
Dried out oobleck
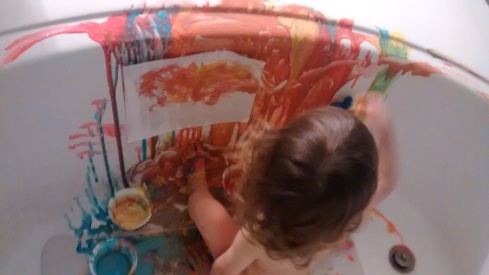
- Tub Paint – You can use shaving cream mixed with a tiny bit of food coloring, or this recipe (this is a tiny batch): 1 tbsp constarch, a couple squirts dish soap, and a tiny bit of food coloring. As with the oobleck, I make a big batch of white, then separate it to add colors. With the soap one, the tub turns into a Giganto-bubble bath after, which entertains Nacho for another good stretch of time.
- Finger paint – When my son was younger, I made his from scratch so they would be taste safe. I used this recipe, and it worked great! We still have Nacho’s original artwork, and it looks great, 2 years later. Now, I tend to buy the store-bought ones when they’re on sale. I should probably get back to making them, though…
- Play dough – Since Nacho is allergic to wheat, and playtime shouldn’t lead to him covered in hives, I used rice flour instead of regular flour. That’s not as cheap as most recipes though, so I would use regular flour if you can. I have totally lost the original recipe I used, but there are infinite variations online. If you don’t have time to cook it, you can use cornstarch and hair conditioner, mixed with a bit of food coloring.
- Play foam – this is a huge hit in our house, and one we usually keep in the tub. I use a couple squirts of dish soap, a small drop of food coloring, and about 1/4 cup of water. You do need a mixer of some kind for this. I use my hand mixer with whisk attachment and it whips the mixture up into foam in no time. I actually keep my hand mixer in the bathroom now.
- Foam dough – This is cornstarch mixed with shaving cream. When I made it, it was somewhat brittle, but some kids will probably enjoy it. I’ll probably try it again with Nacho in the future.
- Mud – regular old mud is one of Nacho’s favorite things. I just make sure to hose him off outside before we head in for his bath.
- Play sand – Sand is really cheap at Home Depot, and stores like that. It is just insanely heavy. Again, a huge hit! We bought one bag last year, for I think $5, and his sand table (which I got for free!) is still pretty full. If you store it outside, put a cover over it when it’s not being used. We just store our play pool upside down on top as a giant lid!
- Jello – Yes, just regular old Jell-o. I buy the store brand, so it’s less than $0.50 per batch. Just follow the package instructions! Easy peasy. I usually make it after he goes to bed, so it’s ready the next day for play time.
- Play snow – This is literally baking soda mixed with water, and that’s all. I kind of just mix amounts until I have a consistency I like. (Man, this is a professional blog, will you look at this? Don’t get too jelly of my amazing, super-helpful writing.) One thing about play snow, you will see recipes all over that call for conditioner or other random ingredients, but seriously, all you need is baking soda and water. You can also play with this in the tub and dump vinegar on it to make crazy amounts of foam!
- Bean tray – Beans are so much fun for kids to play with, but man, they can get everywhere. I use pinto beans because they’re the cheapest of all the beans, and they’re large enough to be easy to find. No lentils for this activity! I have a big, cheap catering pan I store the beans in with a few scoops, so it’s all ready to go when I need a distraction.
- Water – I’m including this because you HAVE to take precautions with water. Not just safety, but holy potato can kids make a mess with it. We played mixing colored water in the tub, and I’m so glad I didn’t try it elsewhere. I also stop up the sink and fill it a little so Nacho can play Pond. Give him a few animals (or toys that desperately need a bath!), and he’s entertained for 20 minutes. Long enough for me to shower (in eyesight of him), or put laundry away.
- Bubbles – Nacho is obsessed with bubbles, whether in the bath or blown, so when I bring them out, we go through a million of them. If we use them indoors, I put towels down to prevent the floor getting slippery. We made bubble snakes outside, which was great until the dog began eating them. Okay, that was funny too, but then he got an upset stomach, so don’t let your dog eat bubbles. It’s not pretty. I used one of Nacho’s socks on the bubble maker instead of the wash cloth in the tutorial, and it worked great.
- Colored ice cubes – Just make colored water, and dump it into ice cube trays. You can use yogurt cups, or other containers to get weird shapes, but make sure the container is freezer safe. There’s a blue stain in my freezer for totally unrelated reasons. Totally. I usually let these warm up a little before handing them off to Nacho so I don’t have to worry about them sticking to his skin or tongue. I have a Batman ice cube tray (YOU CAN’T HAVE IT), and he loves to fit the bats back into the tray.
I wrote about how to reduce the clean up work the other day, so here’s the link if you missed it.
General Tips:
- I buy my food coloring on Amazon, and it’s far cheaper than the grocery store. If I find something even cheaper than that, I will update you all.
- To extend a kiddo’s interest in a particular mess, add fun things to it gradually. For example, if Nacho has play dough, he’ll start to lose interest after 20 or 30 minutes. I just hand him something additional to go with it, like dry pasta, and that adds a new level of interest. Googly eyes make an appearance later, then cookie cutters, etc.
- Save and wash yogurt cups for scooping, or to hold multiple colors of paints/slime/various goops.
- Look around at what you have available, and utilize your resources. Kids will find a way to play with almost anything. Do you have dozens of wine corks around for no particular reason? Not because you’re a parent, surely. Well let the kiddo play with them, and now you’re being resourceful!
- Don’t have a plan for HOW the kid will play with stuff. I mean, other than “Don’t throw it at the cat”. Just let them do whatever comes to mind rather than demonstrating how they “should” play with whatever it is. If they seem a little lost or hesitant, by all means get down there and play around, but otherwise let them at it.
- With my toddler, I don’t ask if he wants to play with something. That’s get a guaranteed “NO”. I just set stuff up and show it to him, then he digs in.
- Start buying industrial shipments of cornstarch. Why does it only come in tiny boxes at the store???
- I save random plastic containers and lids to use with all of these. Coffee can lids make great pretend plates, little segmented trays are great for paints or pouring activities. Ice cube trays are wonderfully versatile. Of course, if your kid is young enough to worry about choking on things, be very careful what you hand them.
- Random items to extend play: straws or chop sticks (for a more eco-friendly version), googly eyes, dried pasta, various plastic containers and trays, milk tops, large beads or buttons, toy dinosaurs, army men, bugs, animals, other figures that are washable, balls, cars (that are easy to clean), Mardi Gras beads, nature materials like pine cones, shells, sticks, acorns, etc, cutlery, like butter knives or spoons, baking pans, like muffin tins or bundt cake pans, cookie cutters, random craft supplies like gems or feathers, and weird kitchen tools, like a garlic press, potato masher, rolling pin, those odd gadgets that accumulate and you forget what they do.
- Above all, have fun! There’s a ton of info here, so just pick and choose a couple things to test out if this is new ground. If you’ve been doing messy play with the kiddos for awhile, hopefully there are some useful tips in here, and maybe you have some of your own! I would love to learn something new, so drop me a comment with your sage advice.
Wow, that is a lot of text. My brain feels so light and empty now! I mean, it usually feels that way until I have some coffee. And then also after I have coffee. And most of the time. You can see why I prefer play things that are simple to set up and clean up!
Take the Mess out of Messy Play
My toddler and I love messy play, but I want to minimize clean up as much as possible. The less time I spend mopping (yes, let’s all pretend I mop), the more time we can play!
We love playing with slime, play dough, oobleck, play snow, paints, and plain old mud.
- Keep it contained.Put the kiddo in a bathtub indoors, or a kiddie pool outside. Or just be outside where a mess won’t matter.
- Use washable container for the mess. I use random plastic containers that are dishwasher safe, like my deviled egg carrier I have never once used. I empty out our play material as much as possible, then toss it into the dishwasher. Tupperware lids, cookie sheets, and large reusable containers are all helpful. Even catering dishes.
- Put something on the floor to catch the mess, preferably something machine washable. I use really old sheets, or cheap shower curtain liners to catch the mess. For something like oobleck, I let it dry on the sheet, then shake it out into the trash before throwing it in the wash. Shower curtain liners are machine washable too! I use one for finger painting, then throw it in the wash on gentle with 2-3 towels. This is a great way to reuse a shower curtain liner that isn’t gross, but you’re replacing for aesthetic reasons, or because those stupid little holes at the top keep tearing for no reason and now it won’t stay up!


A few other tips for messy play:
1. If you have pets, try to use materials that are safe for them to eat. I doubt it’s a great idea for a dog to have a cornstarch feast, but at least you don’t have to worry if they snack on a bit.
2. If I ask my toddler if he wants to play with slime or something, he invariably says no, because that’s a toddler’s favorite word. I’ve had way more success laying out an activity, then just letting him dig in.
3. To extend play, bring out additional play items as the kiddo’s interest fades. For example, if you’ve got plain old play dough out, and your kid starts to wander off, lay some plastic straws or chopsticks down with it. After another 20 minutes or so, some zoo animals make an appearance, etc. Nacho and I played with play dough for 2 hours yesterday, using this method.
4. Some messy items can be reused! If you let oobleck dry out, you can just add water again next time you need to use it (let it dry thoroughly to avoid mold). I make homemade play dough and store it in the fridge for months at a time. Homemade gak can last a couple days in the fridge as well. Mud is eternal, and there’s an endless supply right off my back porch.Messy play is so entertaining for kids, and my son has been a fan since we introduced it. There are so many variations, and recipes available, you can be creative and use what you have available. This is also some of the cheapest entertainment available, so you know that makes me happy!
Creative Coloring

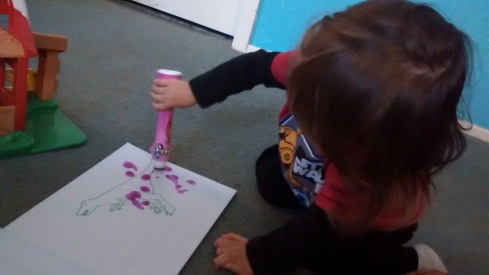
My son tends to not want to color much himself. It got better when we moved from crayons to markers, but he still mostly wants to direct me or Hubby, and tell us what to draw. I don’t know if he gets frustrated, or is unhappy with his results, but we keep trying to get him more involved.
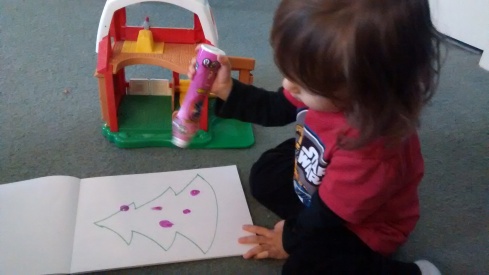
Around Christmas I was digging through stuff (endless amounts of stuff everywhere, always), and I found an old bingo stamp! I figured I’d see if he liked it. I started with a drawing of a Christmas tree for him to decorate, and that was a hit. Then I drew a house, which was okay, then he requested a dinosaur. That was super popular as well. Keep in mind, I think these things are permanent, so take mess precautions, and DO NOT leave those things where a kid can reach.
I did these around Christmas, but since it’s now summer time, I figured I’d make some basic free printables for anyone who wants them. If you’re reading this around winter, I have some done for that also. These are super basic, just to give you a jumping off point. The dots one can be used for pompom sorting as well. Feel free to give your kid blank paper, poster board, wrapping paper, or cardboard to draw on. My son has a giant box he uses as a fort, and we let him color the inside of that as well.


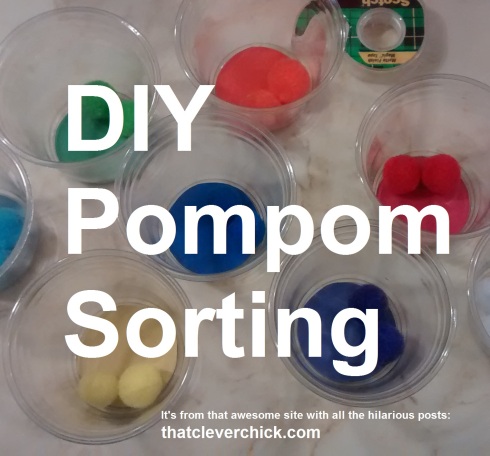
Pompom Sorting
I have a love/hate relationship with Pinterest, the same way most people do. I love getting ideas for new activities with my kid, but some of those blog posts have to be built on a house of LIES. There is no way your 18 month old built a Christmas tree out of playdough and wrapped garlands around it like that, Smothery Mothering!! THERE’S NO WAY. So take Pinterest with an enormous grain of artisan, organic, hand-harvested, pink Himalayan sea salt. OK, rant over. (maybe).
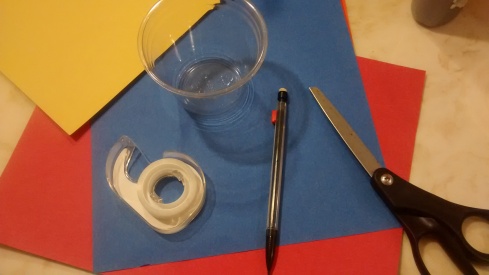
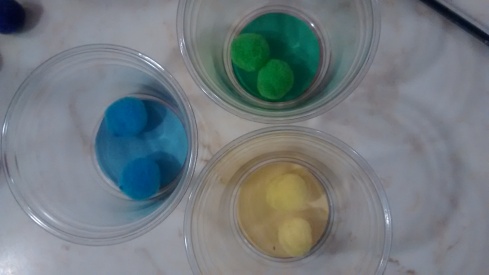
I saw this idea for sorting Pompoms by color as an activity for 2 year olds. Well, I just happen to have one of those at my house, so I thought, why not entertain him? I used construction paper, and plastic cups I had laying around as the basis for this project. Look at all the random junk you’ve accumulated since having a child (I mean, who has time to take out the recycling any more?!?!) and find a few containers that are roughly the same size. You’ll also need scissors, tape, and a pencil. You could probably paint the bottoms of the containers instead of using construction paper if you’d like. I’m not your boss. (But if I am, GET BACK TO WORK, GAYLE!)
Trace the bottom of the container onto the paper. I cut one out, and tested it in the cup until it fit, then used that as my template for the others.
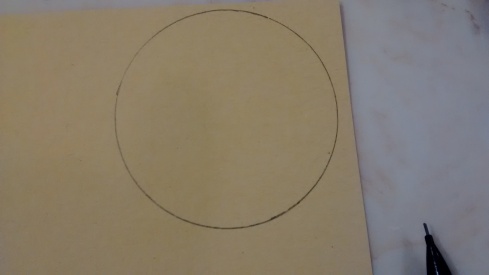
Tape the circles into the bottom.
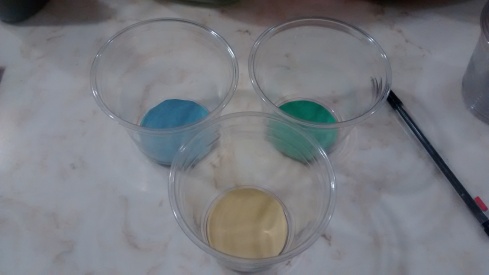
Boom! Ready to play! This only took me 10 minutes or so.
I was making this in the bathroom while my son was in the tub. You guys got to see my counters while they were clean! Oh, I mean, they’re always clean. I’m like, Martha Stewart mixed with June Cleaver, but super hot and witty like Tina Fey, all in one.
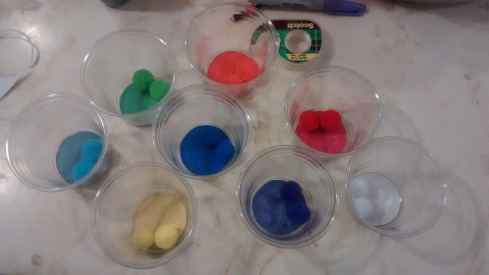
For younger kids, or when just starting to learn colors,use fewer containers and colors. I would also start with colors that are distinctly different from each other, like red and green, or yellow and blue. Orange and red can be a pain to differentiate, so start out simply.
“Why are there no pictures of this mystery toddler playing with this toy his mother so lovingly crafted?” you’re asking. Well, because he immediately wanted to play with the circles in the bottoms of the cups, and cried until I pulled them all out for him. Then he shoved each one into my dresser through a tiny gap in the drawer. Maybe I should have just made that the game? Now I have a new idea…
But you can see why I have a vendetta against Pinterest. It would have been so easy for me to snap a picture of the back of baby Nacho’s head “playing” with this toy while he desperately tried to pull the circles out of the bottom. So don’t feel bad if you make something, and it doesn’t go as planned. All kids are different, and all kids are weird. I try to pay attention and participate in the way he plays with something, rather than trying to guide how he’s “supposed” to play with something. Above all, have fun!